Disclosure: Links that are marked with * are affiliate links, which means that I will receive a commission if you purchase a product through my link. For you, there will be no additional costs.
In the world of web design, a well-crafted footer can make all the difference in user experience and brand perception. With Kadence Elements, you have the power to create a custom and unique footer that not only looks great but also enhances your website’s functionality. In this comprehensive guide, we’ll walk you through the process of building a custom footer using Kadence Elements, providing you with the tools and knowledge to elevate your WordPress site’s design.
You Don’t Have Your Own Kadence Website Yet? It’s That Simple!
Kadence Quick Start Guide
Get Your Own WordPress Website in Just a Few Steps
Understanding Kadence Elements and Footer Basics
Before diving into the creation process, it’s essential to understand what Kadence Elements are and how they relate to footer design.
What are Kadence Elements?
Kadence Elements is a powerful feature of the Kadence Theme that allows you to create custom, reusable content blocks for various parts of your WordPress site, including headers, footers, and hooks.
For a full introduction to the Elements feature of the Kadence theme, check out this article.
The Importance of a Well-Designed Footer
A footer serves several crucial purposes:
- Provides important links and information
- Enhances navigation and user experience
- Displays copyright and legal information
- Reinforces brand identity
- Improves SEO through internal linking
By leveraging Kadence Elements, you can create a footer that not only fulfills these functions but does so in a visually appealing and unique way.
Planning Your Custom Footer Design
Before you start building, it’s crucial to plan your footer design. This step will save you time and ensure a cohesive result.
Identifying Key Components
Consider what elements you want to include in your footer:
- Copyright notice
- Social media links
- Contact information
- Newsletter signup form
- Site map or important page links
- Privacy policy and terms of service links
Sketching Your Layout
Create a rough sketch of your desired footer layout. Consider factors like:
- Number of columns
- Placement of elements
- Mobile responsiveness
- Visual hierarchy
Gathering Assets
Collect all necessary assets for your footer, such as:
- Logo files
- Social media icons
- Brand colors and fonts
Step-by-Step Guide to Building Your Footer
Now that you’ve planned your design, let’s dive into the process of creating your custom footer with Kadence Elements.
Step 1: Accessing Kadence Elements
- Navigate to your WordPress dashboard
- Go to Kadence > Elements
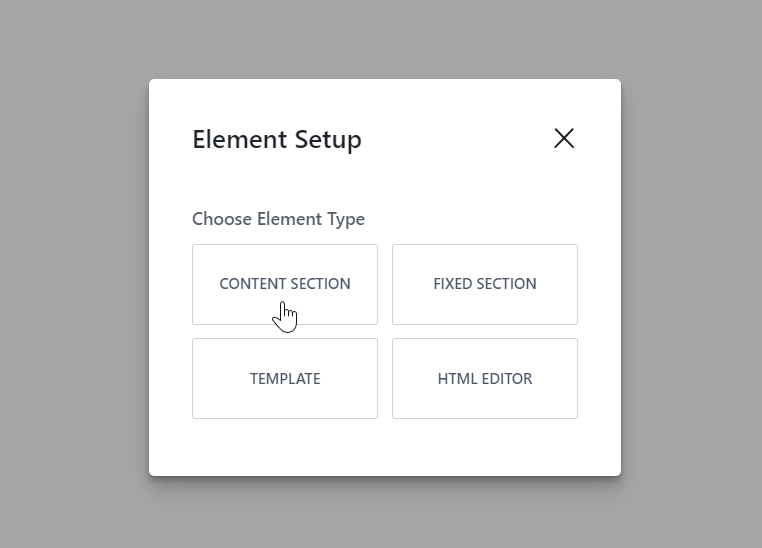
- Click “Add New Element”
- Select “Content Section” as the element type
Step 2: Setting Up the Basic Structure
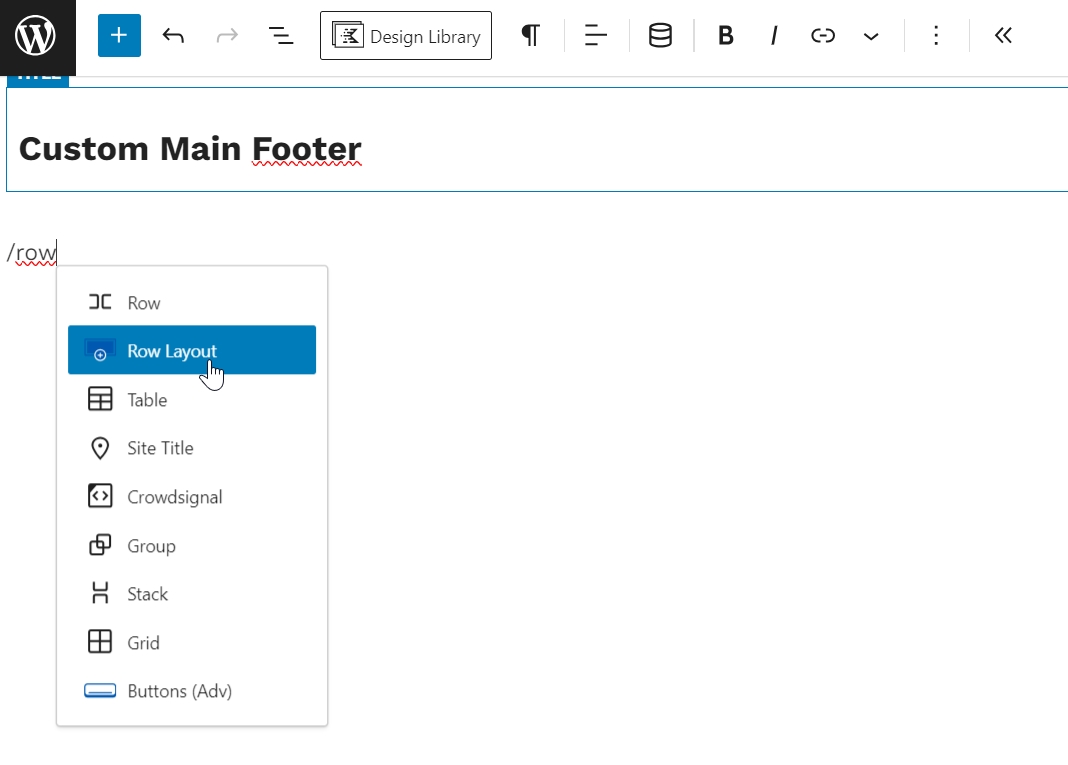
- Give your footer element a name (e.g., “Custom Main Footer”)
- In the editor, add a row element
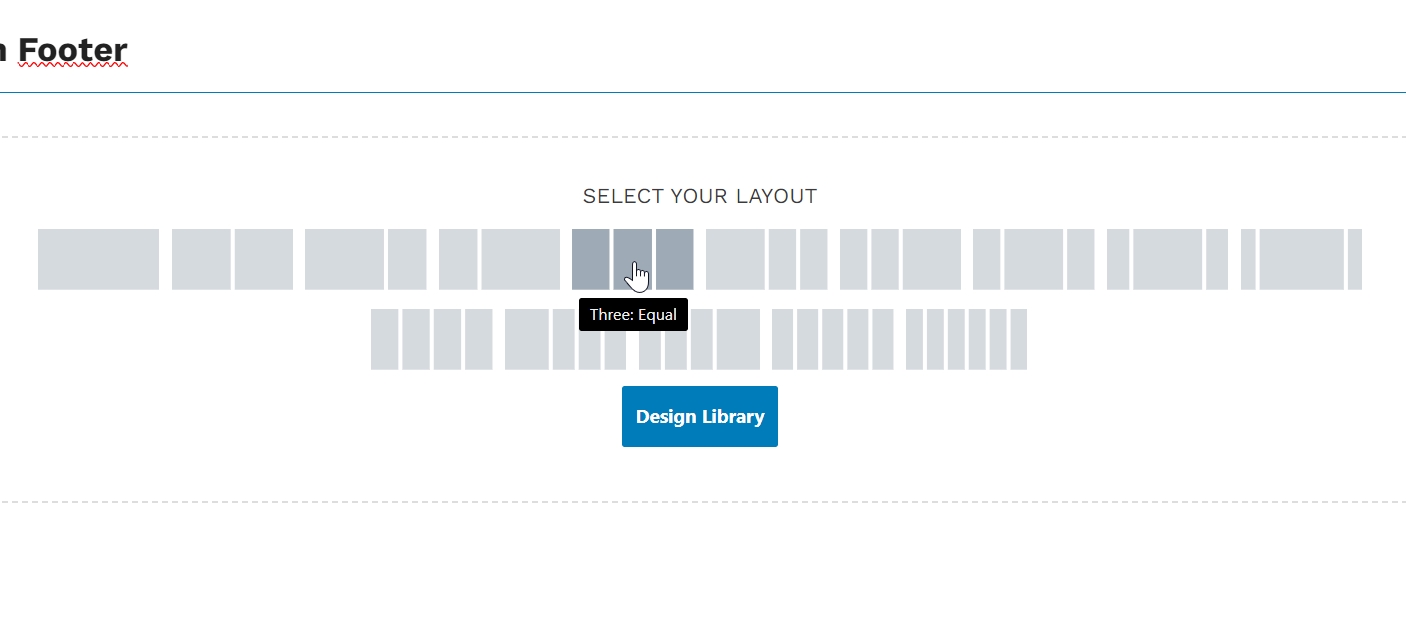
- Choose your desired column structure (e.g., three columns)
Step 3: Adding Content to Your Footer
For each section of your footer, you’ll add and customize blocks:
- Logo and Branding
- Add an image block for your logo
- Customize size and alignment
- Navigation Links
- Use a navigation block
- Organize links into categories if needed
- Contact Information
- Add a paragraph block
- Include phone, email, and address
- Social Media Links
- Use the icons block
- Customize icons and colors to match your brand
- Newsletter Signup
- Embed a form using the advanced form block or a third party integration
Step 4: Styling Your Footer
- Apply background colors or images
- Adjust typography settings for each element
- Set padding and margins for proper spacing
- Ensure consistent use of brand colors

Step 5: Implementing Responsive Design
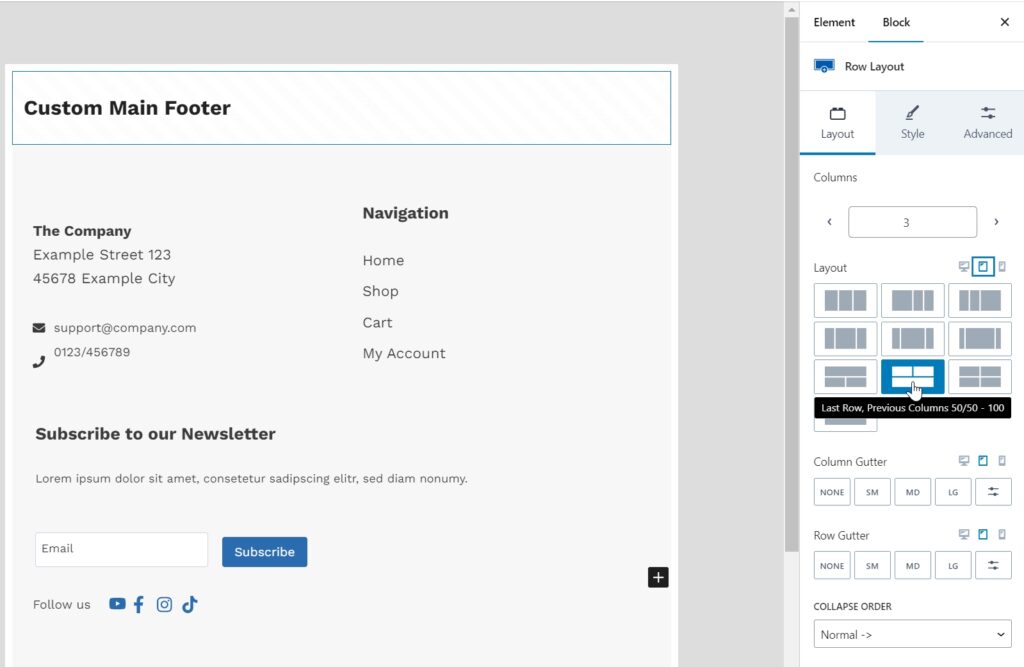
- Preview your footer on different device sizes
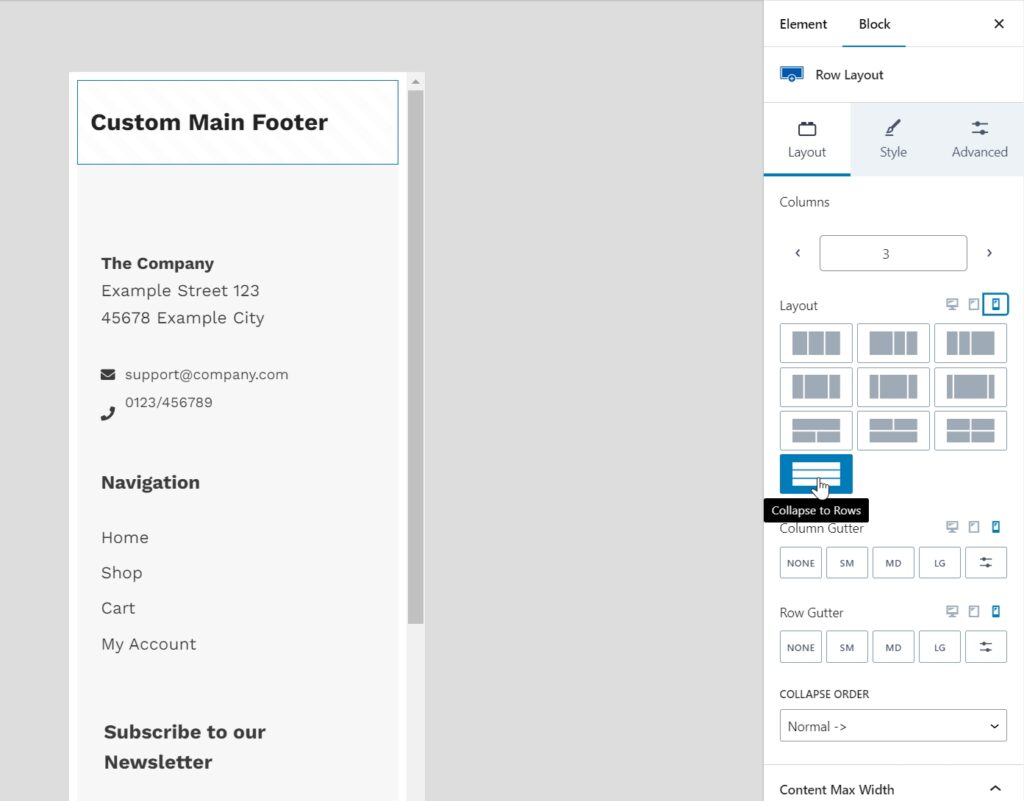
- Adjust column layouts for mobile devices
- Modify font sizes and spacing for smaller screens
Step 6: Setting Display Conditions
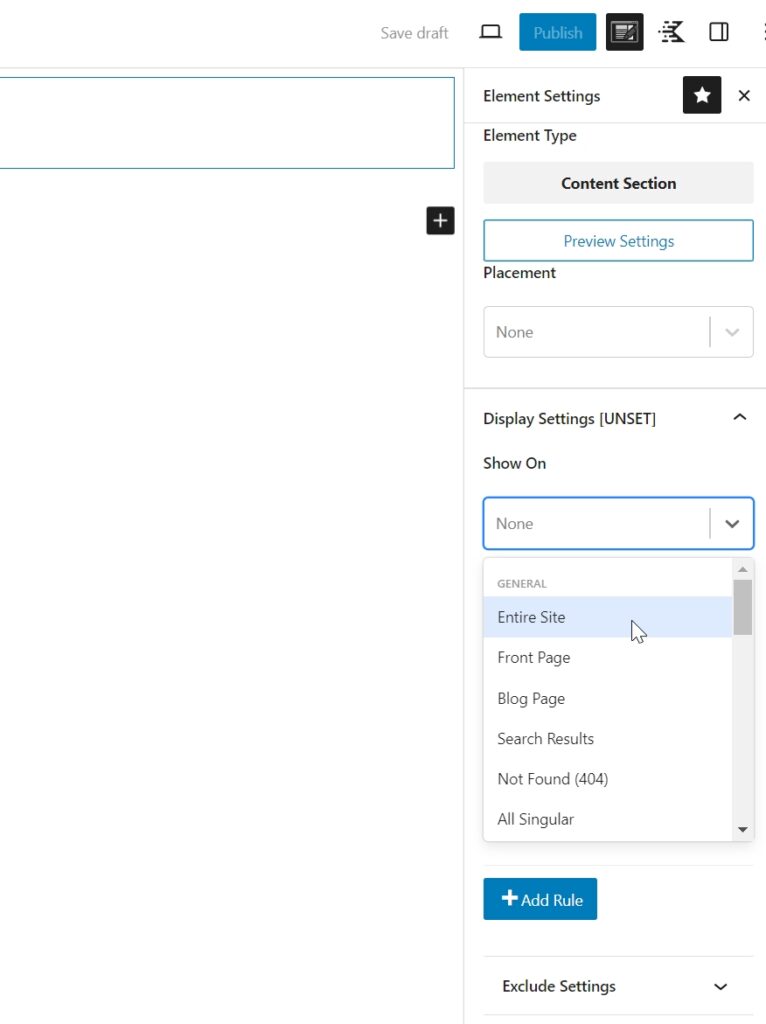
- Click on “Display Settings” in the Kadence Elements settings
- Choose where you want the footer to appear (e.g., all pages, specific post types)
- Set any exclusion rules if needed
Advanced Customization Techniques
Take your footer to the next level with these advanced techniques:
Dynamic Content Integration
Use Kadence dynamic content to display:
- Recent blog posts
- Upcoming events
- Customer testimonials
Animated Elements
Add subtle animations to engage users:
- Hover effects on links and buttons
- Fade-in effects on scroll
- Animated background patterns
Best Practices and Common Pitfalls
To ensure your custom footer is both beautiful and functional, keep these best practices in mind:
Do’s:
- Keep it simple and uncluttered
- Ensure all links are working and relevant
- Use consistent branding elements
- Optimize for mobile devices
- Include a “back to top” button for long pages
Don’ts:
- Overload with too much information
- Use fonts or colors that are hard to read
- Forget to test on various browsers and devices
- Ignore accessibility guidelines
Elevate Your Website with a Custom Kadence Footer
Creating a custom footer with Kadence Elements is more than just a design exercise—it’s an opportunity to enhance your website’s user experience, reinforce your brand, and improve navigation. By following this guide and leveraging the power of Kadence Elements, you’ve taken a significant step towards a more professional and polished website.
Remember, your footer is often the last thing a visitor sees on your page. Make it count by creating a design that’s not only visually appealing but also functional and informative. With your new custom footer in place, you’re sure to leave a lasting impression on your site visitors.
Ready to take your WordPress site to the next level? Start experimenting with Kadence Elements today and watch as your website transforms into a truly unique and engaging online presence!
